Image Map

23 March 2017

Gousto - Everything you need to cook delicious recipes delivered!


As I mentioned back in the fall, I decided to try a meal delivery service, Hello Fresh.  I stayed with them for about six months and for the most part really enjoyed the meals and the convenience.  I had a few blips with missing ingredients, and one missed delivery (total bummer), but for the past six months, I got increasingly aggravated by the fact that they would show me 5 available options, but really only let me choose from four of them. But, of course, you can't tell which one you can't have until you decide you want it and try to choose it.  I have contacted them a few times and got the same answer each time - they know about the issue and their IT department is working on it.  Ugh! So, I decided to give a competitor a try.  The new company I am trying is called Guosto.  I received my first box this week.


My first impression, very similar to Hello Fresh, the cardboard box is neatly packed, and well insulated.  A surprise was the nifty wooden spoon that they included with my first order! Yay - love free stuff!


I laid out the ingredients and perused the recipes that I had chosen this week.  One point for Hello Fresh is that each recipe's cupboard ingredients are packed in their own brown bag. So, I can just grab one from the fridge and know that everything I need is inside (unless they forgot something again!).  With Guosto, I had to sort all the ingredients into two piles.  Took a minute or two, not a big deal.

Tonight's meal is Miso & Sesame Chicken Noodles.

The recipe card is vey similar in layout to the ones I received from Hello Fresh.  One notable difference was that often with Hello Fresh (although this was not consistent), they would include measurements for items  - for example "cut peppers into 1cm slices". I didn't break out a ruler, but it did give me an idea about the ballpark thickness I should aim for.

My ingredients were all fresh and of good quality.  Although one of my girls asked me "why did they give you a bunch of rubber bands?".  Um, those are the noodle nests!

Here is my meal all assembled:

Overall, it was easy to prepare, but like Hello Fresh, the 35 minutes prep time was a bit optimistic!  I would say it was closer to 45-50 minutes.

But, worth it! And the girls all gave it a thumbs up!

22 March 2017

Mad Hatter Tea Party, Part Six - Activities!

We did three activities during the tea party, aside from the eating: decorating cupcakes, decorating teacups, and "pin the grin" on the cheshire cat.


For the cupcake decorating, I pre-made and frosted the cupcakes.  Then, I took these paint palettes and arranged a variety of sprinkles in each compartment.

I placed the cupcake in the center of the palette and let the girls go crazy.  Since there was  large number of girls at the party, we split them into two groups. One group was decorating cupcakes while the other was painting their teacups. Then they switched.

It is a tradition here in the UK to send the birthday party attendees home with their birthday cake, instead of them actually consuming it at the party itself. And that serves as their party favor. I have to say that I think that NOT sending home a baggie of silly little junky toys as birthday favors like we tend to do in the US, is a far better idea!  Our birthday party attendees placed their decorated cupcakes into their decorated teacups and took them home as favors! 


For tea cup decorating, I covered my table with brown Kraft paper, in order to protect it. What I didn't anticipate was that the girls would have a blast drawing all over the table covering!


I purchased Sharpie paint pens and plain white teacups from a restaurant supply store (only 1 pound per cup!) and gave the girls some simple instructions  regarding the permanence of paint pens.


I found an excellent tutorial online that provided instructions for heat setting their designs and sent home a small tag attached to each cup with the directions so their parents could do this part with them at home. 


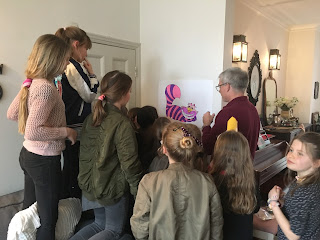
We ended the party with a game of "pin the grin" on the cheshire cat!
(mine)

I had found an inspiration picture on pinterest, and drew out mine freehand.


(the inspiration pic)

21 March 2017

Mad Hatter's Tea Party, Part Five - The Food!

For the food, I created a buffet of finger foods for the girls to snack on.  I borrowed some mis-matched vintage tea cups from a friend (and purchased the rest on eBay). And we served peppermint tea, and Earl Grey.

We served cucumber sandwiches and sandwiches made with clotted cream and strawberry jam. And I cut them into little sandwiches with cookie cutters. 

I used my mini-muffin tin to make little tiny cupcakes.

And what tea party isn't complete without jellybeans and deviled eggs! (The deviled eggs being my Southern girl addition to this tea party!)

The candy necklaces were a huge hit!


As were the fruit kabobs!


16 March 2017

Mad Hatter's Tea Party, Part Four - Decorations!

I created various decorative items for the party. I discussed the chalkboards in my first tea party post, found here.

Other items of decor:

This chalkboard was placed just outside the front door.

I also created this sign for outside.

And this banner of playing cards that I hole-punched and strung on twill tape and then adorned with some ribbon trim.


Here are the hats, all lined up, just inside the front door.


We blew up a ton of balloons and hung a few up and tossed the rest around!


15 March 2017

Mad Hatters Tea Party, Part Three - Mini Top Hats!

Another project I created were top hat headbands for every child attending to wear.

Here is the picture of my pinterest inspiration:


The blog that the pinterest picture leads to provides a very good tutorial on how to make the hats. You can find it here: https://www.diyinspired.com/party-top-hat-headband-diy/

And here is blog post to find out how to create the paper flowers that I chose to adorn our top hats:
http://www.weddingchicks.com/blog/how-to-make-paper-flowers-l-6447-l-45.html

I did take some snapshots of my assembly of one of the top hats, for reference.

The first step was to attach the hat band. I used some simple twill tape that I had on hand, but ribbon would work nicely as well.

Then, I attached the circle for the hat's brim. I just traced the cup's rim onto colored card stock, and then added an extra inch or so before cutting to get the desired width. The original blog poster used circle cutters, but since I didn't own any and didn't want to spend the money to purchase, I just winged it and cut them all out by hand.  Took longer for sure, but was cheaper!

Next, I attached the circle for the top of the hat.  Again, just traced the cup and added a smidge. I used hot glue for all of the glueing.

Next, I attached the flowers I made.

Next, I glued on the headband. Whoops! Note why doing these late at night, while having a glass of wine, wasn't the best idea!

Now, the headband is attached properly!


To finish them off, I added a silver glittery monogram to each of the flower centers.  You know us Southern girls can't resist a monogram! I already had the letters and was lucky enough to have enough to put each child's first initial on their hats!


14 March 2017

Mad Hatter's Tea Party Part Two - Photo Booth Props

Since I last posted, the party has taken place. So, I have more pictures to share with you.  It was great fun and I have heard from many of the Mums that their girls had a great time.

One of the projects I completed for the party was to create a set of photo booth props. I found this picture on pinterest:

I set out to recreate it using colored card stock. As it turns out, my card stock didn't have the stability I thought the props would need, so I drew out all the colored pieces freehand, and then glued them to a backing of posterboard to make sure they would be extra sturdy before attaching  the wooden sticks.  I am sure that I could have purchased sticks to use, but as I was trying to be frugal, I simply used some wooden skewers that I already had on hand.  I made sure, however, that the pointy end of the skewer was secured to the back of the props, so there wouldn't be any sharp points sticking out!

Here are the props that I created:


And here is the Birthday Girl and her Bestie having some fun with them!